
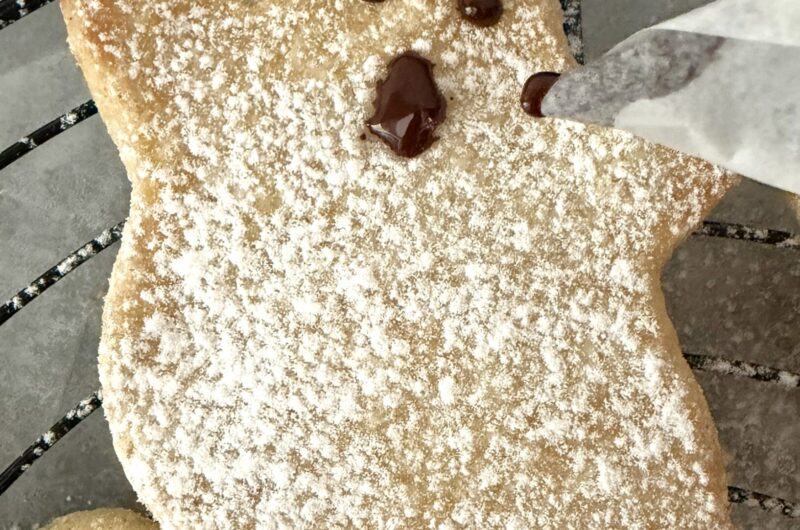
These shortcrust pastry ghost cookies are a simple and festive homemade treat for Halloween. Made with buttery shortcrust pastry, cut into ghost shapes, and finished with a delicate dusting of icing sugar, they look like little white ghosts ready for a Halloween celebration.
With their lightly crisp edges, tender texture, and simple chocolate faces, these cookies are easy to make with everyday baking ingredients. They are perfect for a Halloween party, a seasonal dessert table, or an afternoon of baking with children. The best part is that you do not need complicated decorations to make them look charming.
Why You’ll Love This Recipe
- Simple ingredients: Made with flour, butter, sugar, and egg.
- Easy to shape: A ghost-shaped cookie cutter makes preparation quick and straightforward.
- A snowy white finish: Icing sugar gives the cookies their ghostly appearance.
- Perfect for Halloween: Simple chocolate faces add a playful finishing touch.
- Make-ahead friendly: Prepare the dough in advance and bake when you are ready.
Halloween Ghost Cookies (Easy Shortcrust Pastry Recipe)
Course: DessertDifficulty: Easy4
servings20
minutes10
minutesIngredients
300 g all-purpose flour
200 g cold unsalted butter, cut into cubes
100 g granulated sugar
2 medium egg
1 teaspoon vanilla extract (optional)
A small pinch of salt
- For decorating
2–3 tablespoons icing sugar, for dusting
30 g dark chocolate, for the eyes and mouths
Directions
- Prepare the pastry dough
Add the flour, granulated sugar, and salt to a large mixing bowl. Add the cold butter cubes and rub them into the dry ingredients with your fingertips until the mixture resembles fine breadcrumbs.
Add the egg and vanilla extract, if using. Mix until the ingredients come together into a smooth dough. Avoid overworking the pastry, as this can make the cookies less tender.
Shape the dough into a flat disc, wrap it, and refrigerate for 30–45 minutes. Chilling helps the pastry firm up and makes it easier to cut into neat ghost shapes. - Preheat the oven
Preheat the oven to 180°C conventional or 160°C fan. Line a baking tray with baking parchment.
Lightly flour your work surface and rolling pin. Remove the chilled dough from the refrigerator and let it soften slightly if it is too firm to roll. - Cut out the ghost cookies
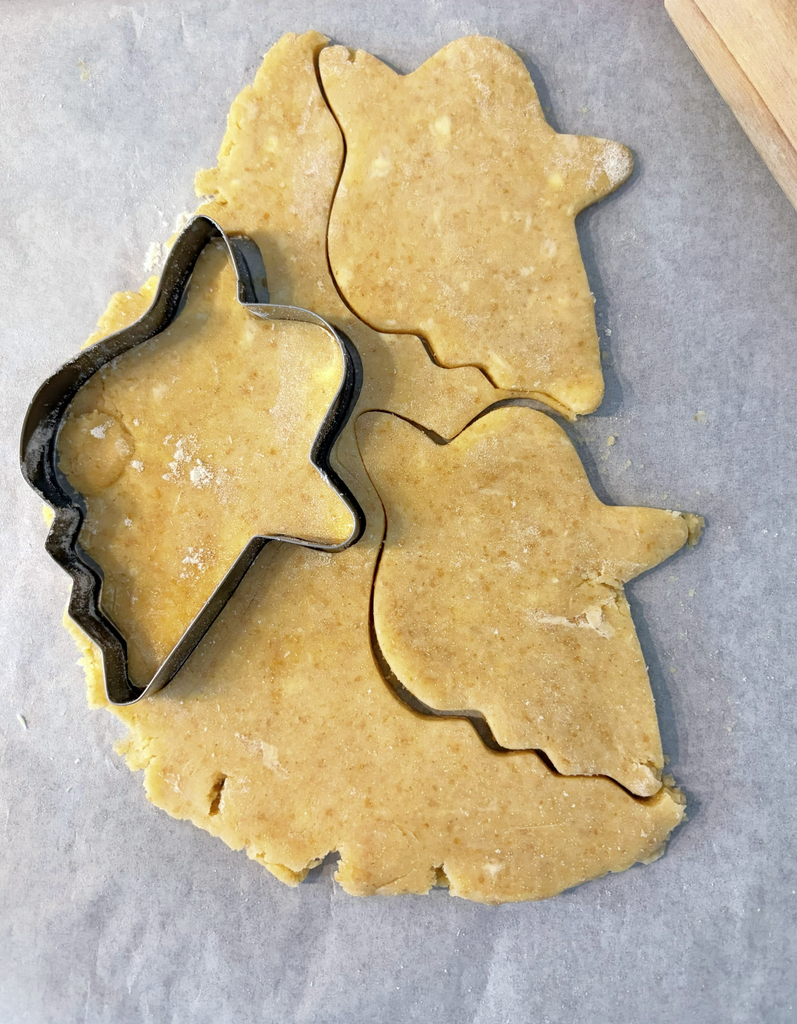
Roll out the dough to approximately 4–5 mm thick. Lightly flour your ghost-shaped cookie cutter and press it firmly into the pastry to cut out the shapes.
Carefully lift each ghost and transfer it to the prepared baking tray, leaving a little space between the cookies. Gather the leftover dough, gently bring it together, and roll it out again to cut more ghosts.
If the dough becomes too soft or sticky, refrigerate it for another 10 minutes before continuing. - Bake the cookies
Bake for 10–14 minutes, depending on the size of your cutter and the thickness of the pastry. The cookies are ready when the edges are just beginning to turn lightly golden.
Avoid waiting for the entire cookie to become golden, as this can make the pastry too dark for the white ghost effect.
Leave the cookies on the baking tray for 5 minutes before carefully transferring them to a wire rack to cool completely. - Dust with icing sugar
Once the cookies have cooled completely, place them on a clean tray or serving surface. Add the icing sugar to a fine-mesh sieve and gently dust the tops of the cookies until they have an even, snowy white coating.
For the whitest finish, dust them just before serving. Icing sugar can absorb moisture over time, so applying it too early may make the coating less visible. - Add the chocolate faces
Melt the dark chocolate gently in the microwave in short intervals, stirring between each one, or use a heatproof bowl over a pan of gently simmering water.
Transfer the melted chocolate to a small piping bag or use a toothpick to carefully draw two little eyes and a tiny mouth on each ghost.
Allow the chocolate to set before arranging the cookies on a serving plate.
Notes
- Keep the butter cold: Cold butter helps create a tender shortcrust texture.
Chill the dough: This makes the pastry easier to roll and helps the ghost shapes hold their outlines during baking.
Roll evenly: Keep the dough approximately 4–5 mm thick so the cookies bake evenly.
Do not overbake: Remove the cookies when the edges are only lightly golden to keep their delicate appearance.
Cool before dusting: Warm cookies can cause the icing sugar to melt into the surface.
Dust just before serving: This helps maintain the bright white finish.
Use a light touch with the chocolate: Small facial details create a clean, simple look against the white coating.
Variations
Vanilla ghost cookies: Add the optional vanilla extract for a gentle vanilla flavour that complements the buttery pastry.
Cinnamon shortcrust cookies: Add ½ teaspoon of ground cinnamon to the flour for a subtle autumn flavour. The cookies will still look white when dusted with icing sugar.
Chocolate-dipped ghosts: Dip the bottom edge of each cooled cookie in melted dark chocolate for a slightly richer finish.
How to Store
Store the baked cookies in an airtight container in a cool, dry place for up to 5 days. Keep them in a single layer or separate the layers with baking parchment to protect their shapes and decorations.
For the best appearance, store the cookies without the icing sugar and dust them shortly before serving. The unbaked dough can be wrapped well and refrigerated for up to 2 days.
You can also freeze the unbaked dough for up to 2 months. Defrost it overnight in the refrigerator before rolling, cutting, and baking.
Frequently Asked Questions
Can I make ghost cookies without a special cutter?
A ghost-shaped cookie cutter is ideal for creating consistent shapes. If you do not have one, you can cut simple ghost outlines from rolled pastry with a small knife.
Why do my ghost cookies lose their shape?
The pastry may have become too warm before baking. Chill the dough thoroughly before cutting, and refrigerate the cut-out cookies for 10–15 minutes if your kitchen is warm.
How do I make the cookies look whiter?
Let the cookies cool completely, then dust them generously with icing sugar using a fine-mesh sieve. For the brightest finish, add the sugar shortly before serving.
Can I decorate the cookies before baking?
It is best to add the chocolate faces after baking and cooling. This keeps the details neat and prevents the chocolate from spreading or becoming dull in the oven.
Can I prepare the dough in advance?
Yes. You can prepare the dough up to 2 days ahead and keep it wrapped in the refrigerator. Let it soften slightly before rolling if it becomes too firm.
Can children help make these cookies?
Yes. Children can help cut the ghost shapes and decorate the cooled cookies with chocolate faces, with adult supervision when handling knives, the oven, and melted chocolate.
Final Thoughts
These shortcrust pastry ghost cookies are a simple way to bring a little Halloween charm to homemade baking. With buttery pastry, a snowy dusting of icing sugar, and tiny chocolate faces, they make a lovely seasonal treat to share with family and friends.


[…] Halloween Ghost Cookies – Buttery ghost-shaped cookies decorated with sweet icing sugar and chocolate faces. They’re a fun addition to any Halloween dessert table. […]